BigQuery, Google’s fully managed, serverless data warehouse, has become an indispensable tool for businesses seeking to analyze large datasets at lightning speed. However, managing non-human access to this tool requires secure authentication methods.
With the proliferation of APIs across sectors, from cloud providers to data platforms and from CRM systems to financial platforms, OAuth 2.0 has emerged as a de facto standard for secure authentication. It helps to ensure that only authorized entities can access certain resources, thus safeguarding sensitive information from unauthorized use.
Yet, while OAuth 2.0 is widely recognized and utilized, the specifics of implementing it can vary significantly across different platforms and use cases.
This post, like a previous one we wrote for Microsoft Graph, will provide a step-by-step approach to implement OAuth 2.0 for secure access to BigQuery.
How to Authenticate to Google BigQuery using OAuth 2.0 Client Credentials
Prerequisites:
Note: This example assumes that you have a GCP Project with BigQuery enabled and data to query.
Steps:
1. Log into GCP and go to the ‘APIs & Services’ -> ‘Credentials Management’ section. This can be accessed directly by going to https://console.cloud.google.com/apis/credentials
[Make sure you are in a GCP Project which you are authorized to use. For this example, we’re using ‘My Project 62571.’]m
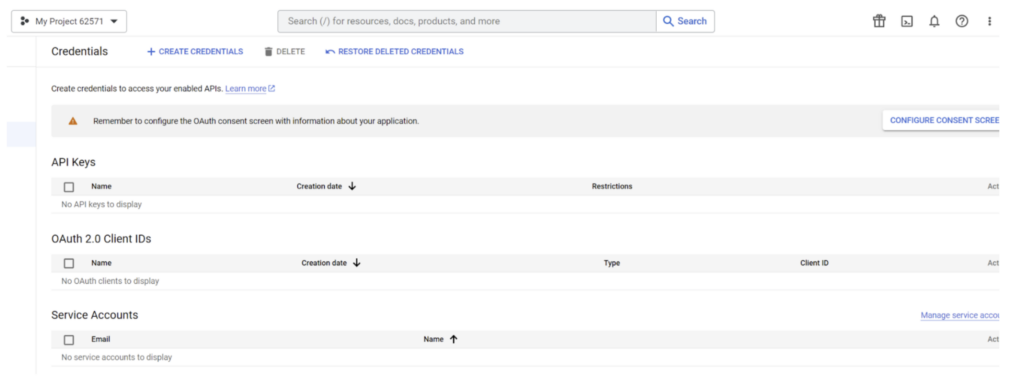
2. Click on the ‘Create Credentials’ button to create an OAuth 2.0 Client ID.
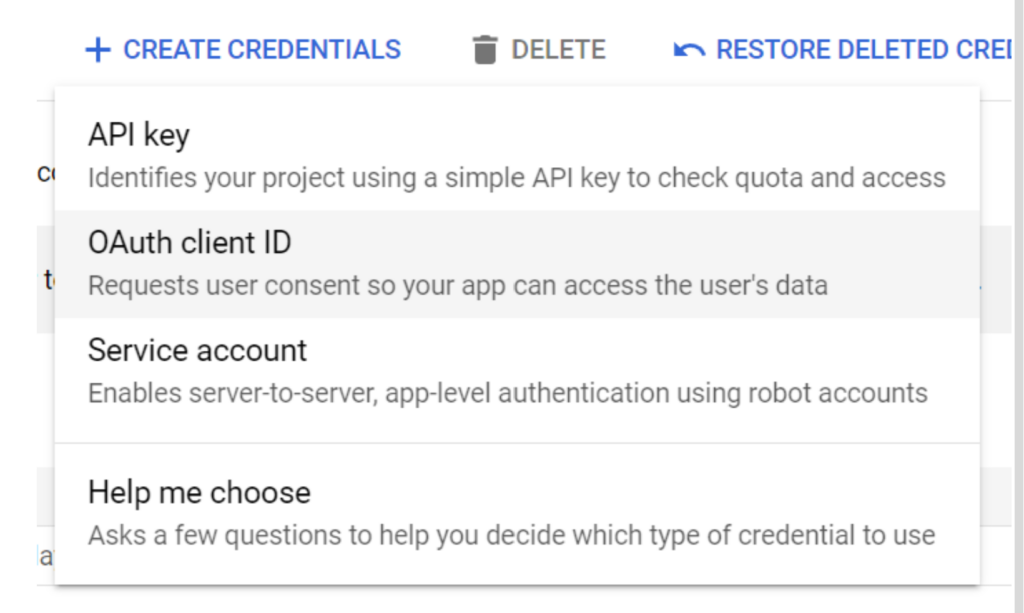
[The first time through, you’ll need to configure an OAuth consent screen. Select ‘Internal’ and ‘Create’ to continue.]
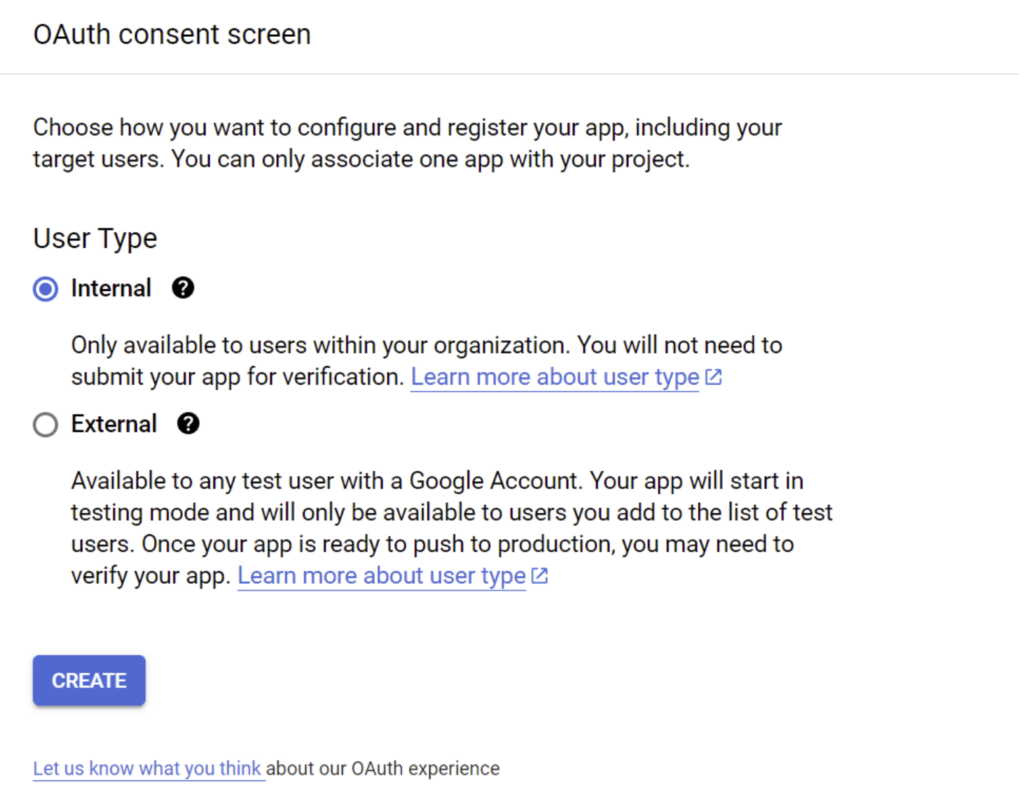
3. Provide the app registration details as requested by GCP, for example:
a. App name: BigQuery Test
b. User support email: Your email address
c. Developer contact Email Address: Your email address
d. Click Save and Continue.
4. Provide the scopes required for Big Query access to this OAuth Client ID, for example:
a. Click ‘Add or Remove Scopes, Big Query’ (https://www.googleapis.com/auth/bigquery) should be sufficient.
b. Click ‘Save’ and ‘Continue.’
c. Verify your configuration and click on ‘Back to Dashboard.’
d. Configure the OAuth2 Client with ‘Application Type’ set to Desktop app and give it a ‘Name’ (e.g. Sample).
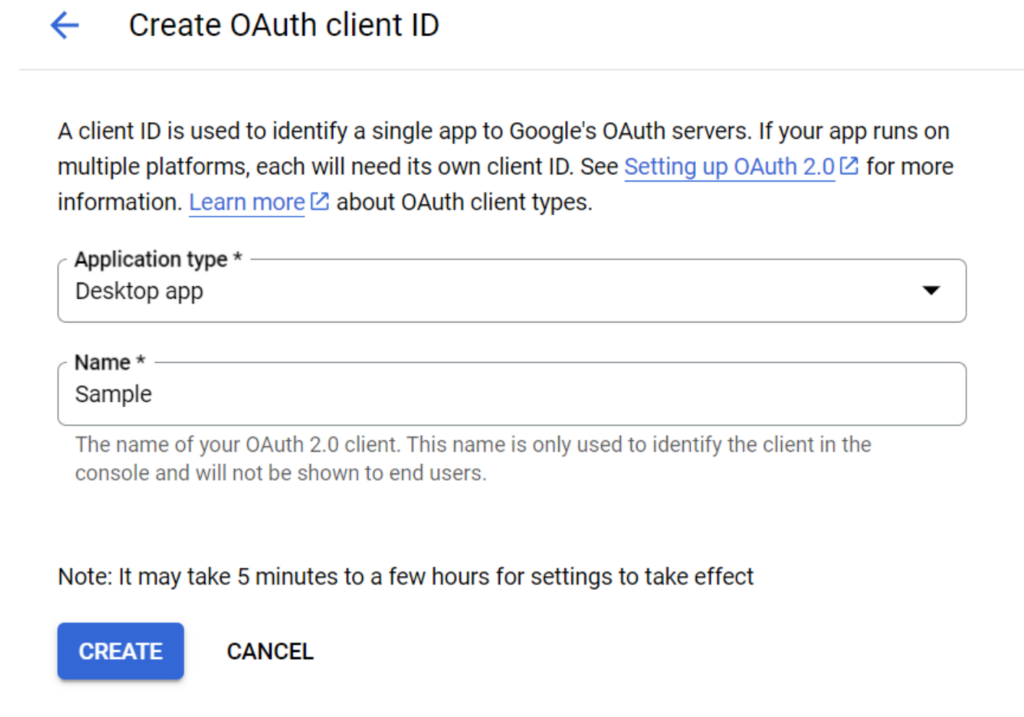
[GCP will generate the necessary configuration file and provide the details along with a download link. Please download the JSON, and we’ll come back to it in a moment.]

5. Let’s now create a sample Python application that can login to GCP and execute a BigQuery query. Sample code:
6. Install the necessary GCP OAuth libraries:
pip install –upgrade google_auth_oauthlib google-cloud-bigquery
7. Please update the gcp-bigquery.py script with appropriate values for ‘GCP_OAUTH_CLIENT_JSON’ and ‘GCP_PROJECT_ID’ that match your environment configuration.
8. Run the python script: python .\gcp-bigquery.py
[This will provide a URL that can be used in a web browser to request authorization and consent for a user who is authorized for the GCP Project being used.]
[The Redirect URI (urn:ietf:wg:oauth:2.0:oob) is a Google specific URN that is used for GCP’s “Installed Apps” OIDC Flow.]

Experience the Difference with Aembit
Are you using traditional OAuth 2.0 client credentials for accessing the Google Big Query? Discover how the Aembit Workload IAM Platform can transform your experience, offering a more secure, efficient, and manageable approach to non-human identity and access management.

